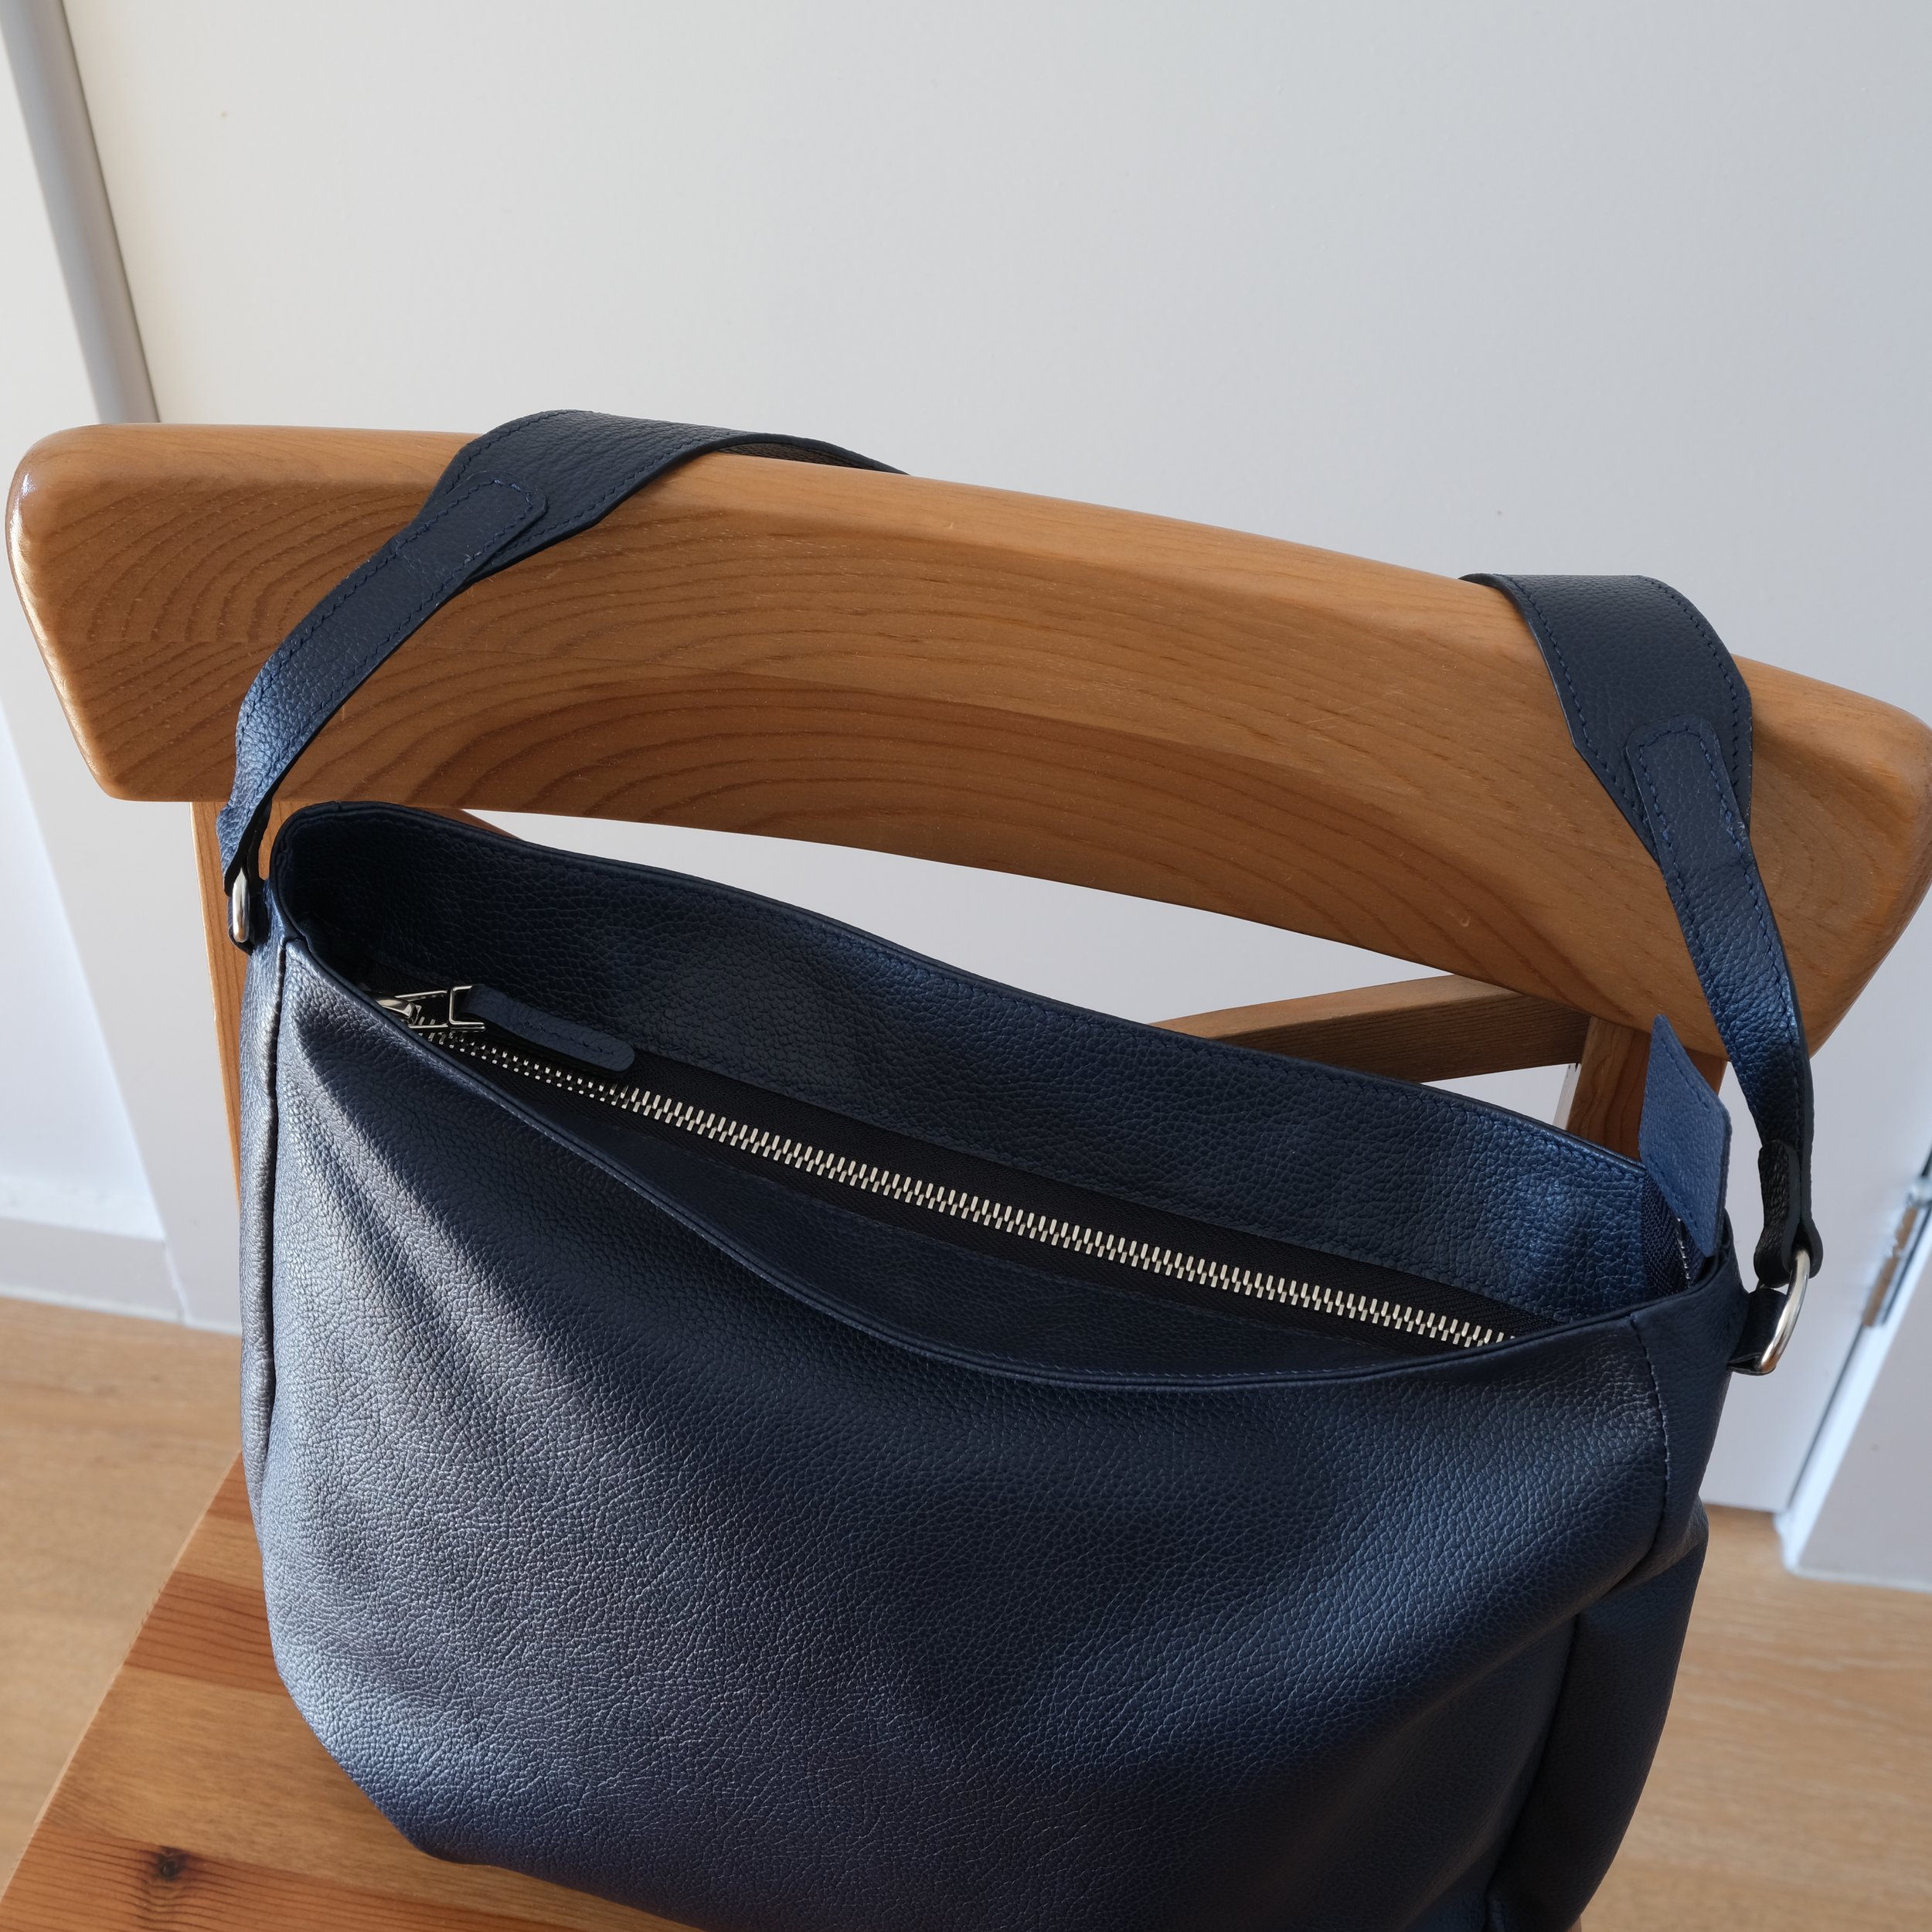
Soft tote made from navy blue premium bit shrink chrome tan leather
My mom asked me to make her a bag with the only requirements being that she wanted it to have quite a few pockets. She planned to carry it on a single shoulder and showed me a friend’s tote she liked. Since time was short, but I wanted her to have a well thought-out bag I decided to buy a pattern by Max Karas.
I modified his pattern slightly though. I printed it in a smaller scale (which reduced my seam allowances and skiving areas), and added a few more pockets to the interior. I also planned to have the handle be different from the one his pattern suggested.
Usually when I plan a project, besides sketching it and then making a pattern, I write down the order of operations so I can methodically construct it. With the pattern already at hand, and with none of my own thought having gone in to create it, the first thing I did was to look at all the pieces and construct it in my head. Then I wrote down the steps I would need to take to make it happen. It was an interesting creative challenge as I modified it in my head too.
Preparation
The bag was to have a leather exterior, leather handle, leather zip facing, and fabric liner. The liner was to be attached to the outer bag as a drop in liner.
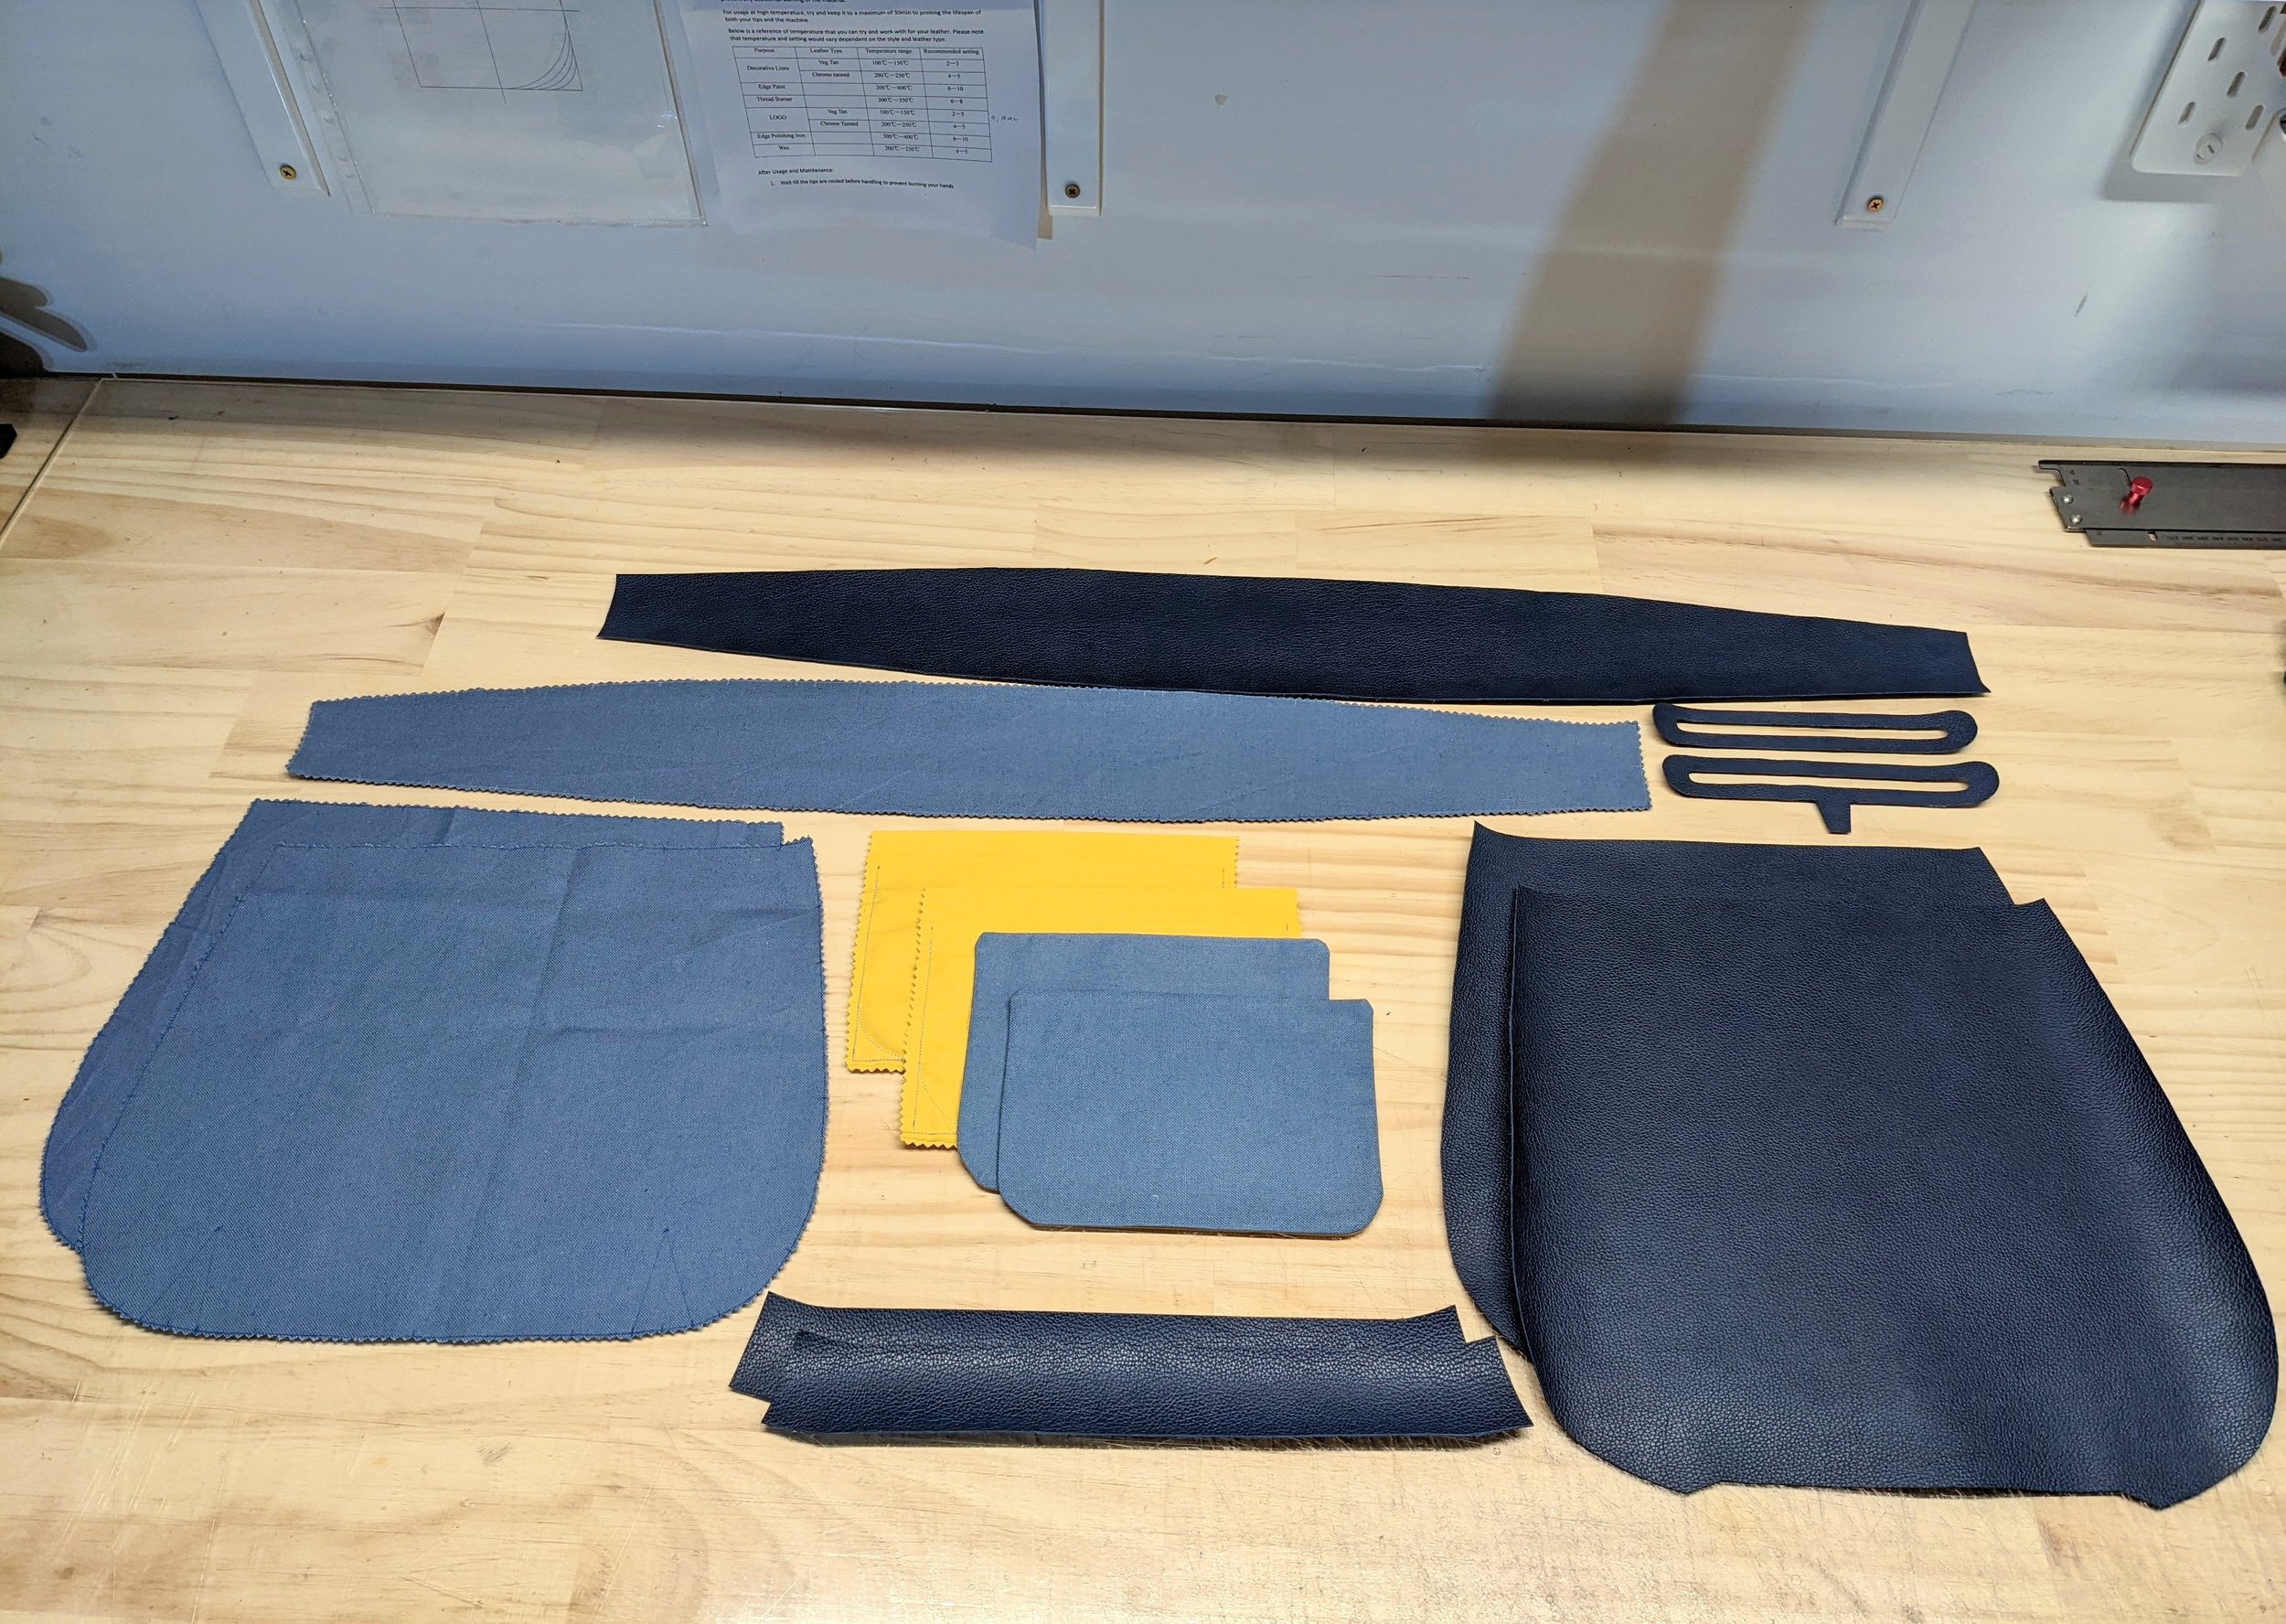
So first thing I did was cut out all the pieces I planned to use. Most of the bag construction was to be a turned construction, so not much edge finishing would be required. Once all the leather parts had been cut out I edge finished the pocket borders and zipper facings.
For the outer leather I used dark blue premium bit shrink from Hashimoto Leathers. For the liner I used a mix of blue linen and yellow cotton. I like to use light coloured liners so that when you look into the bag it’s not a giant void, and you can actually see what’s in it.
Bag outer, liner, pockets, and details cut out
Assembly
Liner
While the liner was still flat, I started on the pocket construction. After edge-finishing the leather pocket borders, I pre-punched these and using double-sided tape attached them to the front and back body panels.
A modification I made to the pattern was to add an additional pocket to the liner. I pinned these on and stitched them to both pieces of the liner body.
Coming back to the leather edged pockets, I stitched the leather to the liner. Then I cut the hole that would form the pocket, folding the fabric back to make a neat edge. I stitched the yellow pocket behind the liner so the pocket would hang in the cavity between the outer leather and the liner.
One last thing while the liner was flat was to attach the zip facing. I prepared the zipper tape and attached it to each side of the facing. Then I attached the assembled zip facings to the flat liner. These would later be sewn to the outer leather bag.
When stitching to an unturned edge of fabric it helps to stabilise the edge and make it rigid. It wouldn’t have been a problem if I was using a leather sewing machine, but when using a pony the fabric edge needs a bit of structure. I used painters tape to hold the fabric in place on the leather and give it support. Given that this part would be completely hidden I left the tape in place and stitched right through it. Next time I’d extend the fabric liner to be a bit taller so I could fold it down and add structure with hemming tape.
There were darts in the pattern, so I sewed these last and pressed them to the centre. Finally it was time to attach the gusset and complete the liner portion of the bag. When the gusset was completely sewn I could finally close the top edges of the zipper facing and stitch them together.
Liner body panels finished. Gusset pinned and ready to sew
Outer
Assembly of the outer was much simpler. The only complexity was a pleat that needed to be sewn. This pleat was only folded at the bottom to give a voluminous effect to the leather.
Care was taken to ensure that all the edges that required it were skived down to minimise bulk prior to assembling the outer bag.
Inside view of pleat on leather outer
Outside view of pleat on leather outer
The gusset was glued right sides together to one of the panels starting from the middle and working up both sides. Then I used round dents to punch holes from the inside (since this is a turned construction). Using reinforcement tape where the holes will be punched is a good idea if the leather has been skived really thin since there might be a risk of tearing. Once the panel was stitched up I glued the other panel, punched the holes and stitched it.
The top of the bag also needed to be turned to provide a clean edge (I could have chosen to shorten this and paint the top, but I stuck with the pattern). With the gusset now sewn in, the tops could now be turned.
Starting to look like the promised bag
I took this opportunity to do a quick dry-fit by inserting the liner into the outer bag and making sure everything fit fine. This is a good time to check the fit of the liner and re-sew adjustments if necessary.
The last thing to do before the tops are sewn shut is to attach the enchapes. The pattern gave me placements for these on the gusset, but I wasn’t confident that everything would size up nicely since I had to turn the top edge so I chose to attach them at this point by measuring down from the top of the turned edge to ensure equal spacing on both sides.
Once enchapes are in place the top edge of the bag can be stitched. Last thing was to make the strap (I deviated from the pattern and made a flat strap instead of the corded one) and attach it to the enchapes.


